MongoDB Elections

On Monday of this week, Amazon’s EC2 service suffered a major outage, which they call “performance issues”, which we all know is simply not true.

This is not a post about how Amazon has failed us. Everyone goes down. We use AWS because it’s flexible, and we need the flexibility. This is a post about how Gimme Bar went down due to this outage, despite our intentions of making everything resilient to these types of failures. It is a post about how I accidentally misconfigured our MongoDB Replica Set (“RS”).

When one of the us-east availability zones died (aside: this was us-east-1c on the Fictive Kin AWS account, but I’ve learned that the letter is assigned on a per-account basis, so you might have lost 1a, 1e etc.), I knew what was wrong with the RS right away. In talking this over with a few friends, it became clear that the way MongoDB elections take place can be confusing. I’ll describe our scenario, and hopefully that will serve as an example of how to not do things. I’ll also share how we fixed the problem.

Gimme Bar is powered by a three-node MongoDB replica set. A primary and a secondary, plus a voting-but-zero-prority delayed secondary. The two main nodes are nearly-identical, puppeted, and are in different Amazon AWS/EC2 Availability Zones (“AZ”). The delayed secondary actually runs on one of our web nodes. It serves as a mostly-hot “oops, we totally screwed up the data” failsafe, and is allowed to vote in RS elections, but it is not allowed to become primary, and the clients (API nodes) are configured to not read from it.

In the past, we did not have the delayed secondary. In fact, at one point, we had three main nodes in the cluster (a primary and two secondaries, all configured for reads (and writes to the primary) by the API nodes).

In order for MongoDB elections to work at all, you need at least three votes. Those votes need to be on separate networks in order for the election to work properly. I’ll get back to our specific configuration below, but first, let’s look at why you need at least three votes in three locations.

To examine the two-node, two-vote scenario, let’s say we have two hypothetical, identical (for practical values of “identical”) nodes in the RS, in two separate locations: Castle Black and Winterfell. Now, let’s say that there’s a network connection failure between these two cities. Because the nodes can’t see each other, they each think that the other node is down. This makes both nodes attempt an election, but they both destroy their own votes because there is not a majority. (A majority is ((“number of nodes” ÷ 2) + 1), or in this scenario: 2 nodes. The election fails, the nodes demote themselves to secondary, and your app goes down (because there’s no primary).

To solve this problem, you really need a third voting node in a third location: King’s Landing. Then, let’s say that Castle Black loses network connectivity. This means that King’s Landing and Winterfell can both vote, and they do because they have a majority. They come to a consensus and nominate Winterfell (or King’s Landing; it doesn’t matter) to be Primary, and you stay up. When Castle Black comes back online, it syncs, becomes a secondary, and the subjects rejoice.

MongoDB has non-data nodes (called arbiters). These can be helpful if you’re only running two MongoDB nodes, and don’t want to replicate your data to a third location. Imagine it’s really expensive to get data over the wall into King’s Landing, but you still want to use it to vote. You could place an arbiter there, and in the scenario above where Castle Rock loses connectivity, King’s Landing and Winterfell both vote. Since King’s Landing can’t become primary (it has no data), they both vote for Winterfell, and you stay up. When Castle Rock rejoins the continent, it syncs and becomes secondary… and the subjects rejoice.

So, back to Gimme Bar. In our old configuration, we had three (nearly) identical nodes in three AZs. When one went down, the other two would elect a primary, and our users never noticed (this is far better than rejoicing). At one point, we upgraded the memory on our database nodes, and realized that we really only needed one secondary (two nodes). As discussed above, we can’t run a RS with just two nodes, so we added an arbiter on one of our ops boxes, which was in a third AZ. We were still AZ-failure tolerant.

Then, at some point, we thought about the “Sean accidentally types db.users.remove() into a late-night console and the users do the opposite of rejoicing” scenario. Thus, we set up one of our web nodes to act as a delayed secondary, as described above. When we did this, we removed the now-redundant arbiter from the RS. We still had three votes in the RS, so all was good… right? Not exactly.

What we neglected to notice is that gbweb01 (where we set up the delayed secondary) was in the same AZ as gbdb03 (our priority Primary). This was, unfortunately, the same AZ that suffered performance issues on Monday. So, a majority of our voters (two of the three) were knocked out, and gbdb04 (normally our wired secondary) was unable to elect itself primary, so we went down. Luckily, so did about half of the Internet, so we were just noise in an otherwise-noisy Monday afternoon.

To solve the problem, after Amazon had mopped up its mess, I simply moved the delayed secondary to gbweb03 which is not in the same AZ as gbdb03 or gbdb04 and reconfigured the RS. Sync, secondary, three votes, and our cluster is happily redundant and AZ-fault-tolerant again. During the outage, I could also have just reconfigured the RS to give gbdb04 the only vote, thus forcing it to become primary, but we were already under pretty heavy load from the API nodes screaming “where did the DB go?!” so we just waited it out at that point.

In discussing this whole thing with Paul, he mentioned that he was setting up a Mongo RS for his most-excellent Where’s It Up service and asked me to take a look at his RS config.

Paul has lots of servers in lots of places, so he set up MongoDB nodes on three of them: Washington, San Antonio and Montreal. He wanted Washington to be the primary whenever possible, though, so he set up an additional arbiter on the same box (but different port) in Washington. So, now, his RS had 4 votes: two in Washington, one in San Antonio, and one in Montreal. This is not immediately obvious, but let’s say that Washington were to go down. San Antonio and Montreal would say “we each have one vote. That’s two votes. Out of four. We’re not a majority!” and they would demote themselves to secondaries, waiting for Washington to be restored. The solution is to remove the arbiter. It’s one less vote, and Washington doesn’t hold two. Now if any node goes down, the other two each get a vote (2/3, a majority), and the election can proceed as intended.

Hopefully this was easy to follow without illustrations or other, specific configuration data. If not, please comment, and I’ll help however I can. Obviously, this is not meant as a guide to configuring RS elections, but more of an anecdotal guide to not-configuring-your-RS-improperly. Don’t make my mistakes. (-:

Berliner Weiße

I think this is the first piece I’ve written on my blog that is tagged only “beer”; apologies to my readers who don’t care about such things (there are feeds for PHP and Web as well, if you’d prefer to avoid the occasional post on beer geekery).

I love a good berliner weiße beer. For those of you that haven’t had the pleasure of enjoying a glass, it’s a very light and refreshing, sour and acidic, low alcohol beer. It’s as acidic as lemonade, and low enough in alcohol that the Germans even occasionally refer to it as children’s beer.

I’ve found a few examples in bottles (while travelling), but it’s very rare that I find a good berliner weiße on tap, and even more rare that the one on tap is pouring properly (they’re usually under-carbonated, really yeasty, and they pour all foamy). I prefer mine straight (“ohne schuss”), but they’re traditionally (at least for some values of traditional) consumed mit schuss — that is, with either raspberry (“himbeersirup”) or woodruff (“waldmeistersirup”) syrups to balance the lactic, yogurty sourness of the berliner weiße base with sweet fruity flavours. If you like sour, I highly recommend you try it all three ways, if you’re ever given the chance.

A few years ago, before I’d ever even had my first taste of berliner weiße, I was listening through Jamil Zainasheff’s radio show wherein he described all of the different BJCP styles, and gave hints on how to brew each of them. A few episodes were exceptionally helpful, but the one on berliner weiße really resonated with me.

In the episode, he describes the beer and how to sour it after fermentation with a lactobacillus culture, but also talks about how “some brewers” sour mash the grist to form the lactic component, and I knew I had to try this technique. (I’ve also discussed sour mashing with Will Meyers of Cambridge Brewing (last time I saw him, I thanked him for the advice, and he assured me that it was his pleasure since he had nearly no recollection of the entire weekend of the event where we discussed it (-: ), and with John Kimmich of The Alchemist in Vermont.)

As a result of this good advice, and some experimentation on my part, I recently won a gold medal in competition with my berliner [style] weiße (the sour raspberry version of the same beer also won a silver).

I’m about to dive deep into beer nerdery here, so please feel free to stop reading at any time, but if you’re interested in my sour mashing (at home) technique, please read on. I’ve posted my berliner weiße recipe on my site, and last year I posted some photos on Flickr. Here we go…

The sourness in my berliner weiße comes completely from the sour mash. In most other sour beers (such as lambics, flanders red, gueuze, etc.), the sour components are yeast- and bacteria-derived after the boil as part of the fermentation process. In mine, all of the lactic sourness is in the beer before it’s boiled.

The mash was mostly normal, but I kept it very thick. More on this later, but I added water over the next couple of days to help control the temperature, so thicker is better. Luckily, this is such a low-gravity beer that it’s easy to make a thick mash without it being “too thick” for efficient conversion. I let the mash convert fully, but instead of lautering into the kettle, I just cooled it down to around 40°C, which is close to the optimal temperature to grow lactobacillus.

Once it has cooled down to ~40°C, I added a pound of unmilled 2-row malt and stirred it in. This was instead of using a lactobacillus culture, because grain contains natural lactobacillus on the husks. On a previous batch, I’d milled the grain that I added post-conversion, but this introduced a *lot* of starch into the finished beer. This doesn’t matter too much, but it made… shall we say “digestion”… difficult. (-:

With the extra pound of 2-row stirred in, and the undrained mash sitting at around 35°C, I flooded my mash tun with CO2 (from a tank), sealed it up (my mash tun is a cooler, so it holds temperature pretty well), and put it in a warm place.

In my experience, you’ll want to taste the mash every 8 hours or so to see how it’s progressing. Every time you do so, you should measure the temperature, and if it’s much below 35°C, add some boiling water and stir to get the temperature back up to the range where the lacto is most healthy. Remember to flood the tun with CO2 again after you’ve tasted and stirred.

You probably won’t want to taste the mash. It smells horrible. Really horrible, but there’s really no other way to test it that I know of. (If you’ve ever thought that it might be an OK thing to leave your freshly-used mash tun for a day or two before you clean it out, you know the horrible smell I’m describing.) You could probably measure the pH of the liquid and consider it “done” when it gets low (acidic) enough. Really, though, you should taste it. It won’t hurt you, and it’s good to know what the components of your beer taste like. To be honest, it tastes much better than it smells.

The reason I suggested a thick mash, above, is that these boiling water additions (to get the temperature back up to ~35°C) will thin out the liquid. If you’ve accounted for this, it’s fine. You could also use a more active heating method (such as heating the whole thing up in a pot, or drawing off some of the liquid and boiling that), but the infusion technique seems to work pretty well for me.

Personally, I sour the entire mash: grain and liquid. Some brewers will sour part of the liquid from the mash, and blend it back to the unsoured portion of the (refrigerated or pasteurized-by-boiling) mash liquor to get an exact blended flavour. This technique probably works just fine, but the full-sour method worked for me, so I just went with that.

The reason I flood my mash tun with CO2 is that the lactobacillus works anaerobically — that is without oxygen. I’ve heard that keeping oxygen out of your wort will promote the growth of lactic acid (and other lacto-derived components), but will prevent the “bad bugs” from taking over your wort. I haven’t had much experience with “bad bugs” in this process, myself, but I have noticed that the mash gets a lot less ugly if I’m more zealous with my application of CO2 to reduce oxygen in the mash tun during souring.
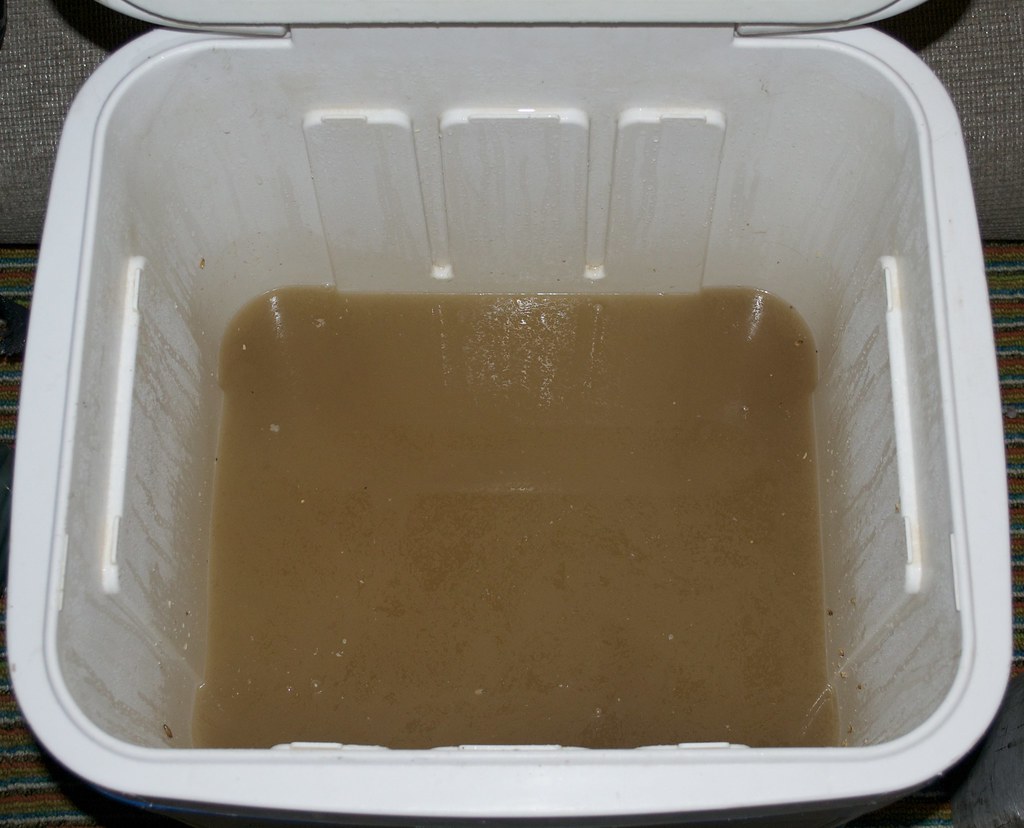
The mash after 48h

After around 48 hours (in my experience), at over 30°C, tasted every 8 hours or so, the mash will be soured enough to resume brewing.

I recirculated and ran the liquid from the mash into my kettle, as normal. I heated the wort to boiling as normal, except, since this will be a short boil, I put my immersion chiller directly into my kettle right from the start (I normally add it with 15 minutes left in the boil, to heat-sanitize). Be very careful with this wort as it climbs to the boiling point. It will boil over, and it will do so spectacularly, if you’re not attentive.
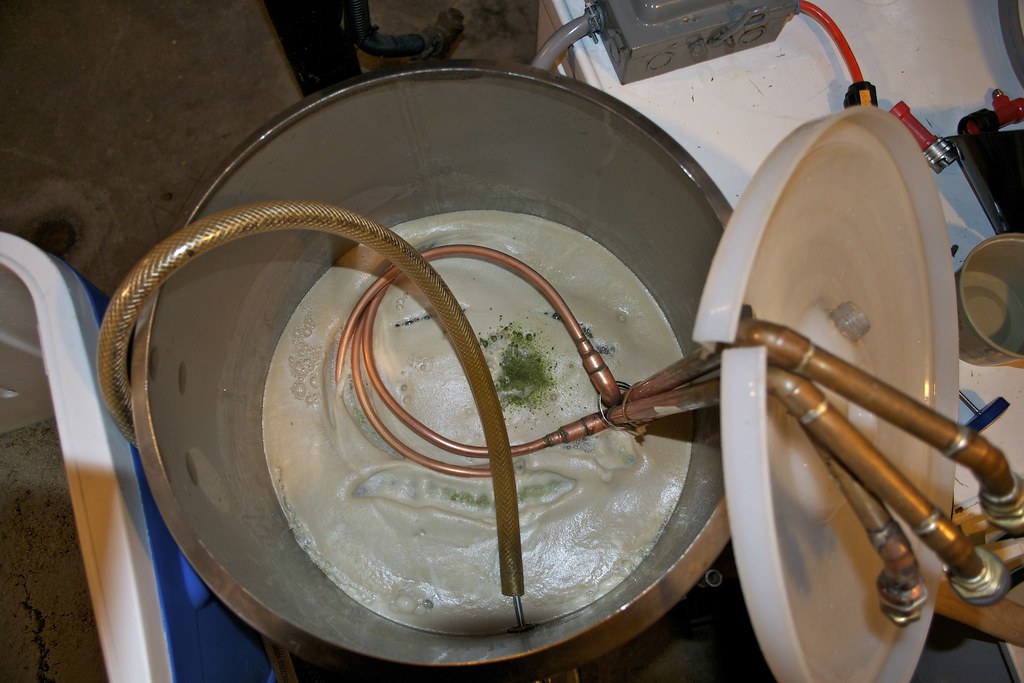
Hot break—or whatever it is

For some reason (perhaps starch or protein from the unconverted, additional, souring malt), the hot break foam on this wort is unlike any other I’ve ever seen. It is thick and gelatinous. It’s almost like meringue. The hop addition stayed completely on top of the foam until I stirred it in.
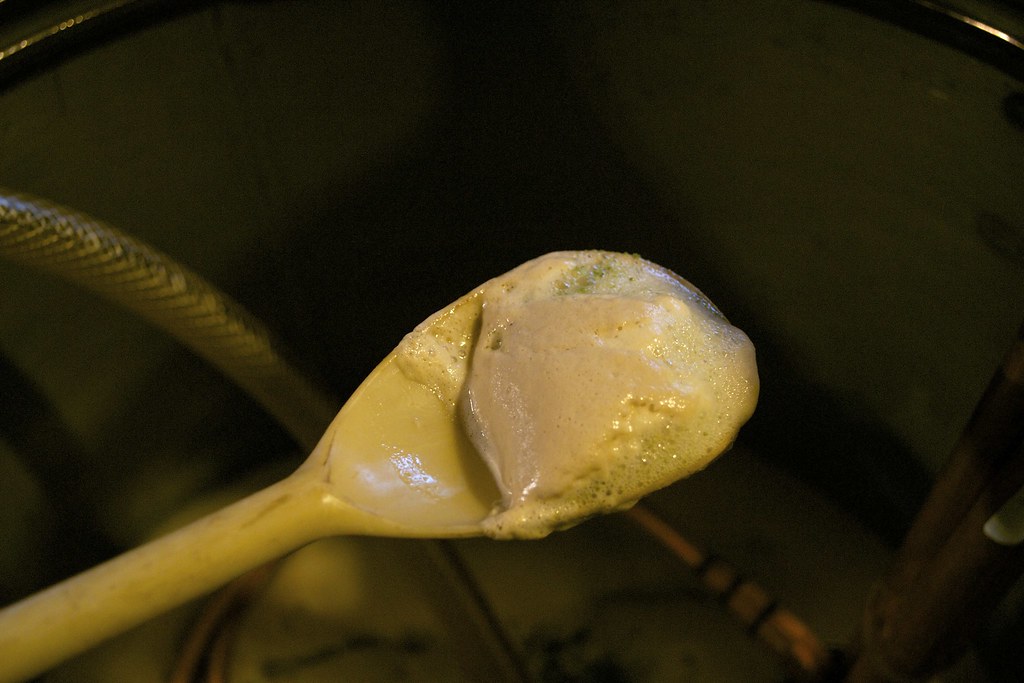
Meringue-like foam

Traditionally (again, for some value of traditional) berliner weißes are either boiled for a very short amount of time, or not boiled at all. I decided to go for a 15 minute boil to arrest (kill) the lactobacillus and to sanitize my chilling equipment.

After boiling, I fermented normally with a clean ale yeast (WY1056 or WLP001 work just fine). It’s a low-gravity beer, so it ferments out very quickly (even though it’s far more acidic at this point than most other worts you’d attempt to ferment). It’s super ugly going into the fermenter, and not much prettier when fermentation is complete (a very few days later). I can go from grain to glass (including two days of mash-souring) and one night of chilling and forced carbonation in just six days.
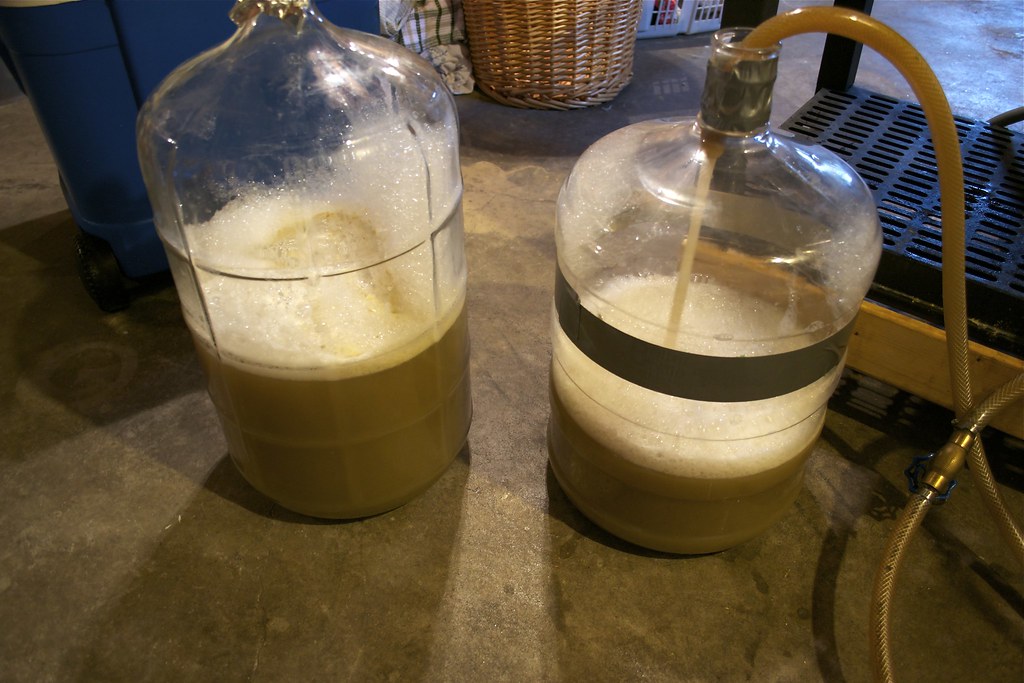
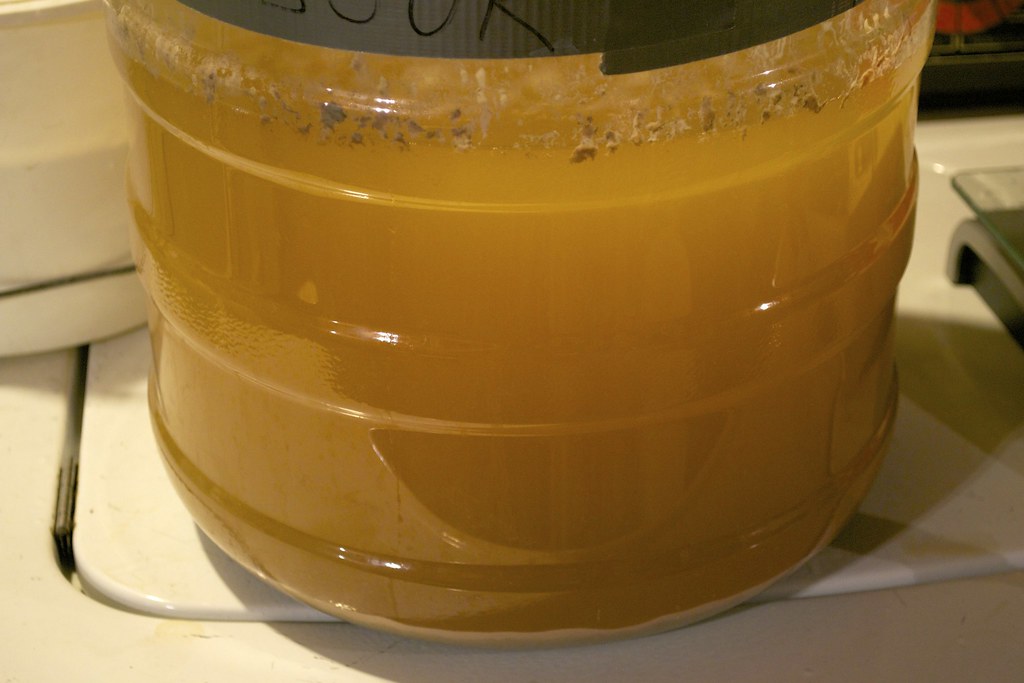
This is the ugliest beer I make

Not much prettier after fermenting

One of the nice things about using the clean-yeast, sour-mash technique is that post-boil, this beer can be treated mostly just like a normal ale. You don’t have to worry about it “infecting” your equipment because it’s just acidic; it’s not actually still full of lactobacillus because we killed that off in the boil.

This past year, I wanted to try making my berliner weiße into a fruit beer. The previous summer (when they were at their peak), I went to the market and bought a kilogram of fresh raspberries and froze them. After fermentation was complete, I racked half of the beer onto the kilo of raspberries (still frozen), and let them sit there around for 10 months (I didn’t intend to leave it on the fruit for so long, but life got complicated). By the next morning, the beer had taken most of the colour from the berries, and left them white (and the beer red). I think the acidity of the finished beer prevented further infection that would normally take place from unpasteurized fruit.
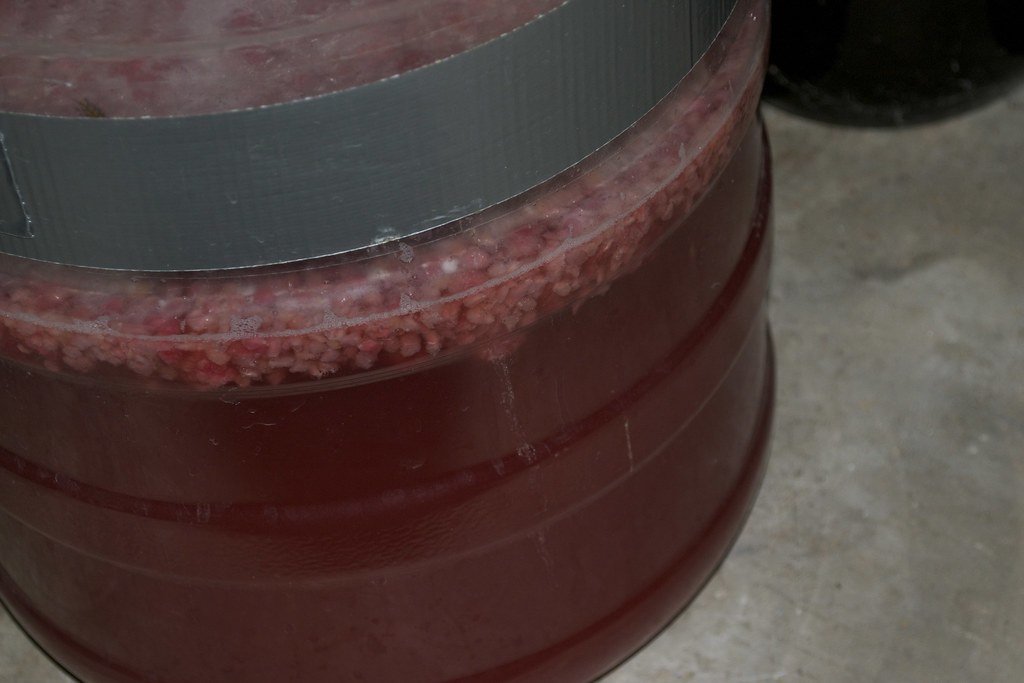
Red beer

When you’re done, you’ll have the most delicious, most refreshing, sour-like-lemonade, lawnmower beer that you can imagine — at least if you like that type of thing. If you’re really lucky, you might even end up with a gold medal.

Update: James from Basic Brewing Radio was kind enough to have me on his show (the July 26, 2012 episode) to discuss this article. Check it out.

Deploy on push (from GitHub)

Continuous deployment is all the rage right now, and I applaud the use of systems that automate a task that seems way easier than it is.

That said, sometimes you need something simple and straightforward: a hook that easily deploys a few pages, or a small application, all without often-complicated set up (come on, this is a PHP-focused site, mostly).

Sometimes, you just need to deploy code when it’s ready. You don’t need a build; you don’t need to run tests — you just need to push code to a server. If you use git and GitHub (and I think you should be using GitHub), you can easily deploy on push. We use a setup like this for PHP Advent, for example (it’s a very simple app), and we also used this approach to allow easy deployment of the PHP Community Conference site (on Server Grove), last year.

There are really only three things that you need, in most cases, to make this work: a listener script, a deploy key and associated SSH configuration, and a post-receive hook. This is admittedly a pretty long post, but once you’ve done this once or twice, it gets really easy to set up deploy hooks this way. If your code is in a public repository, you don’t even need to do the SSH configuration or deploy key parts.

The listener is just a simple script that runs when a request is made (more on the request bit below). This can sometimes be a bit tricky, because servers can be configured in different ways, and are sometimes locked down for shared hosting. At the most basic level, all your listener really needs to do is git pull. The complicated part is that git might not be in your web user’s path, or the user’s environment might otherwise be set up in a way that is unexpected. The most robust way I’ve found to do this just requires you to be as explicit as possible when defining the parameters around the call to git pull.

To do this with PHP (and this method would port to other platforms, too), make a script in your application’s web root (which is not necessarily the same thing as the git root), and give it a name that is difficult to guess, such as githubpull_198273102983712371.php. The abstracted name isn’t much security, but much security isn’t needed here for the simple cases we’re talking about, in my opinion. In this file, I have something like the following.

<?php
$gitpath = '/usr/bin/git';
header("Content-type: text/plain"); // be explicit to avoid accidental XSS
// example: git root is three levels above the directory that contains this file
chdir(__DIR__ . '/../../../'); // rarely actually an acceptable thing to do
system("/usr/bin/env -i {$gitpath} pull 2>&1"); // main repo (current branch)
system("/usr/bin/env -i {$gitpath} submodule init 2>&1"); // libs
system("/usr/bin/env -i {$gitpath} submodule update 2>&1"); // libs
echo "\nDone.\n";

The header prevents accidental browsers to this page from having their clients cross-site-scripted (XSS). The submodule lines are only necessary if you’re using submodules, but it’s easy to forget to re-add these if they’re removed, so I just tend to use them every time. 2>&1 causes stderr to get redirected to stdout so errors don’t get lost in the call to system(), and env -i causes your system() call to be executed without inheriting your web user’s normal environment (which, in my experience, reduces confusion when your web host has git-specific environment variables configured).

Before we can test this script, we need to generate a deploy key, register it with GitHub, and configure SSH to use it. To generate a key, run ssh-keygen on your workstation and give it a better path than the default (such as ./deploy-projectname), and use a blank password (which isn’t the most secure thing in the world, but we’re going for convenience, here). Once ssh-keygen has done its thing, you’ll have two files: ./deploy-projectname (the private key), and ./deploy-projectname.pub (the matched public key).

Copy the private key to your web server, to a place that is secure (not served by your web server, for example), but is readable by your web user. We’ll call this /path/to/deploy-projectname. SSH is (correctly) picky about file permissions, so make sure this file is owned by your web user and not world-writable:

chown www-data:www-data /path/to/deploy-projectname
chmod 600 /path/to/deploy-projectname

Now that we have the key in place, we need to configure SSH to use this key. For this part, I’m going to assume that projectname is the only repository that you’ll be deploying with this method, but if you have multiple projects on the same server (with the same web user, really), you’ll need to use a more complicated setup.

You’ll need to determine the home directory of the web user on this server. One way to do this is just to check the value at $_ENV['HOME'] from PHP; alternately, on Linux (and Linux-compatible su), you can sudo su -s /bin/bash -u www-data; cd ; pwd (assuming the web user is www-data). (Aside: you could specify the value of the HOME environment variable in your call to env and avoid some of this, but for some reason this hasn’t always worked properly for me.)

Once you know the home directory of the web user (let’s call it /var/www for the sake of simplicity (this is the default on Debian type systems)), you’ll need to mkdir /var/www/.ssh if it doesn’t already exist, and make sure this directory is owned by the right user, and not world-writable. As I mentioned, SSH is (rightly) picky about file permissions here. You should ensure that your web server won’t serve this .ssh directory, but I’ll leave the details of this as an exercise to the reader.

On your server, in /var/www/.ssh/config (which, incidentally, also needs to be owned by your web user and should be non-world-readable), add the following stanza:

Host github.com
  User git
  IdentityFile /path/to/deploy-projectname

Those are the server-side requirements. Luckily, GitHub has made registering deploy keys very easy: visit https://github.com/yourusername/projectname/admin/keys. “Add deploy key”, give it a title of your liking (this is just for your reference), and paste the contents of the previously-generated deploy-projectname.pub file.

At this point, your web user and GitHub should know how to speak to each other securely. You can test your progress with something like sudo su -u www-data -s /bin/bash ; cd /path/to/projectname ; git pull, and you should get a proper pull of your previously-cloned GitHub-hosted project.

You should also test your pull script by visiting http://projectname.example.com/githubpull_198273102983712371.php (or whatever you named it). If everything went right, you’ll see the regular output from git pull (and the submodule commands), and Done. If not, you’ll need to read the error and figure out what went wrong, and make the appropriate changes (another exercise to the reader, but hopefully this is something you can handle pretty easily).

The last step is to set up a post-receive POST on GitHub. Visit https://github.com/yourusername/projectname/admin/hooks, and add a WebHook URL that points to http://projectname.example.com/githubpull_198273102983712371.php. Now, whenever someone does a git push to this repository, GitHub should send a POST to your githubpull script, and your server should pull the changes.

In order for this to work properly (and avoid conflicts), you should never change code directly on the server. This is a pretty good rule to follow, even if you don’t take this pull-on-push approach, for what it’s worth.

Note that other than the bits about registering a deploy key, and setting up the post-receive POST, most of this can be ported to a system that uses git without a GitHub-hosted repository.

Additionally, you should prevent the serving of your .git directory. One easy way to do this is to keep your web root and your git root at different hierarchical levels. This can also be done at the server configuration level, such as in .htaccess if you’re on Apache.

I hope this helps. I’m afraid I’ve missed some bits, or got some of the steps wrong, despite testing as I wrote, but if I have, please leave a comment and I’ll update this post as necessary.

Lexentity

A very long time ago (three and a half years ago), I wrote a little utility to help us with the 2008 edition of PHP Advent. The utility is called Lexentity, and my recent blogging uptake made me realize that I’ve never actually written about it on here, so here it is (mostly borrowed from the README).

Let's face it--this sentence is much "uglier" than the one below it.
Let’s face it–this sentence is much “prettier” than the one above it.

Lexentity is a simple piece of software that takes HTML as input and outputs a context-aware, medium-neutral representation of that HTML, with apostrophes, quotes, emdashes, ellipses, accents, etc., replaced with their respective numeric XML/Unicode entities.

Context is important. It is especially important when considering a piece of HTML like this:

<p>…and here's the example code:</p>
<pre><code>echo "watermelon!\n";</pre></code>

Contextually, you’d want here's to become here’s (note the apostrophe), but you certainly don’t want the code to read echo “watermelon!\n”;.

A fancy/smart/curly quotes apostrophe is appropriate, but curly quotes in the code are likely to cause a parse error.

Lexentity understands its context, and acts appropriately, by means of lexical analysis, and turning tokens into text, not through a mostly-naive and overly-complicated regular expression.

Regarding context, my friend and former colleague Jon Gibbins said it best in this piece on his blog: In modern systems, you can’t count on your HTML to always be represented as HTML. It’s often (poorly) embedded in RSS or other HTML-like media, as XML.

Therefore, it is important to avoid HTML-specific entities like &rdquo; and &hellip;, and instead use their Unicode code point to form numeric entities such as &#8230;. This ensures proper display on any (for small values of “any”) terminal that can properly render Unicode XML, and avoids missing entity errors.

You can try a demo at http://files.seancoates.com/lexentity, and the (PHP) code is available on GitHub.

We still use it for PHP Advent, and I ran this post through it. (-:

Use `env`

We use quite a few technologies to build our products, but Gimme Bar is still primarily a PHP app.

To support these apps, we have a number of command-line scripts that handle maintenance tasks, cron jobs, data migration jobs, data processing workers, etc.

These scripts often run PHP in Gimme Bar land, and we make extensive use of the shebang syntax that uses common Unix practice of putting #!/path/to/interpreter at the beginning of our command-line code. Clearly, this is nothing special—lots of people do exactly this same thing with PHP scripts.

One thing I have noticed, though, is that many developers of PHP scripts are not aware of the common Unix(y) environment helper, env.

I put this on Twitter a while ago, and it seemed to resonate with a lot of people:

The beauty of using /usr/bin/env php instead of just /usr/local/bin/php or /usr/bin/php is that env will use your path to find the php you have set up for your user.

We've mostly standardized our production and development nodes, but there's no guarantee that PHP will be in the same place on each box where we run it. env, however, is always located in /usr/bin—at least on all of the boxes we control, and on my Mac workstation.

Maybe we're testing a new version of PHP that happens to be in /opt/php/bin/php, or maybe we have to support an old install on a different distribution than our standard, and PHP is located in /bin/php instead of /usr/bin/php. The practice of using env for this helps us push environmental configurations out of our code and into the actual environment.

If you distribute a PHP application that has command-line scripts and shebang lines, I encourage you to adopt the practice of making your shebang line #!/usr/bin/env php.

Note that this doesn't just apply to PHP of course, but I've seen a definite lack of env in the PHP world.

PHP as a templating language

There’s been quite a bit of talk, recently, in PHP-land about templates and the ramifications of enforcing “pure” PHP scripts by preventing scripts from entering HTML mode. I’m not quite sure how I feel about this RFC, but it got me thinking about the whole idea of using PHP for templating in modern web apps.

For many years, I was a supporter of using PHP as a templating language to render HTML. However, I really don’t buy into the idea of adding an additional abstraction layer on top of PHP, such as Smarty (and many others). In the past year or so, I’ve come to the realization that even PHP itself is no longer ideally suited to function as the templating engine of current web applications — at least not as the primary templating engine for such apps.

The reason for this evolution is simple: modern web apps are no longer fully server-driven.

PHP, as you know, is a server technology. Rendering HTML on the server side was fine for many years, but times have changed. Apps are becoming more and more API-driven, and JSON is quickly becoming the de facto standard for API envelopes.

We can no longer assume that our data will be rendered in a browser, nor that it will be rendered exclusively in HTML. With Gimme Bar, we render HTML server-side (to reduce page load latency), in JavaScript (when adding or changing elements on an already-rendered page), in our API (upcoming in a future enhancement), in our iPhone app, and certainly in other places that I’m forgetting.

Asset rendering in Gimme Bar can be complicated — especially for embed assets. We definitely don’t want to maintain the render logic in more than one place (at least not for the main app). We regularly need to render elements in both HTML and JavaScript.

This is precisely why we don’t directly use PHP to render page elements anymore. We use Mustache (and Mustache-compatible Handlebars). This choice allows us to easily maintain one (partial) template for elements, and we can render those elements on the platform of our liking (which has been diversifying more and more lately, but is still primarily PHP and JavaScript).

Rendering elements to HTML on the server side, even if transferred through a more dynamic method such as via XHR, really limits what can be done on the display side (where “display side” can mean many things these days — not just browsers).

We try hard to keep the layers our web applications separated through patterns such as Model/View/Controller, but for as long as we’ve been doing so, we’ve often put the view bits in the wrong place. This was appropriate for many years, but now it is time to leave the rendering duties up to the layer of your application that is actually performing the view. This is often your browser.

For me, this has become the right way to do things: avoid rendering HTML exclusively on the server side, and use a techonology that can push data rendering to your user’s client.

Natural Load Testing

My friend Paul Reinheimer has put together an excellent product/service that is probably of use to many of you.

The product is called Natural Load Testing, and it harnesses some of the machinery that powers the also-excellent wonderproxy and its extremely useful VPN service.

The gist is that once you've been granted an account (they're in private beta right now, but tell them I sent you, and if you're not a horrible person such as a spammer, scammer, or promoter of online timesuck virtual farming, you'll probably get in—just kidding about that farming clause… sort of), you can record real, practical test suites within the simple confines of your browser, and then you can use those recorded actions to generate huge amounts of test traffic to your application.

In principle, this idea sounds like nothing new—you might already be familiar with Apache Bench, Siege, http_load, or other similar tools—but NLT is fundamentally different from these in several ways.

First, as I already mentioned, NLT allows you to easily record user actions for later playback. This is cool but on its own is not much more than merely convenient. What isn't immediately obvious is that in addition to the requests you're making (HTTP verbs and URLs), NLT is recording other extremely important information about your actions, too: I find HTTP headers and timing particularly interesting.

Next, NLT allows you to use the test recordings in a variable manner. That is, you can replace things like usernames and email addresses (and many other bits of variable content) with system-generated semi-random replacements. This allows you to test things like a full signup process, or semi-anonymous comment posting, all under load.

NLT also keeps track of secondary content that your browser loads when you're recording the test cases. Things like CSS, JavaScript, images, and XHR/Ajax requests are easy to overlook when using less-intelligent tools. NLT records these requests and (optionally) inserts them into test suites along side primary requests.

Tools like Siege and the others I've mentioned are useful when you want to know how many concurrent requests your infrastructure can sustain. This is valuable data, but it is often not really practical. Handling a Slashdotting (or whatever the modern day equivalent of such things is called) is only part of the problem. Wouldn't you really prefer to know how many users can concurrently sign up for your app, or how many page-1-to-page-2 transitions you can handle, without bringing your servers to their knees (or alternatively: before scaling up and provisioning new machines in your cluster)?

Here's a practical example. Since before the first edition of the conference, the Brooklyn Beta site had been running on my personal (read: toy) server. Before launching this year's edition of the site, which included the announcement for Summer Camp, I got a bit nervous about the load. I wasn't so much worried about the rest of my server suffering at the traffic of Brooklyn Beta, but more about the Brooklyn Beta site becoming unavailable due to overloading. This seemed like a good opportunity to give NLT a whirl.

I recorded a really simple test case by firing up NLT's proxy recorder, and visiting each page, in the order and timeframe I expected real users to browse from page to page. Then we unleashed the NLT worker hounds on the pre-release version of the site (same hardware, just not on the main URL), and discovered that it wasn't doing very well under load. I then set up Varnish and put it into the request chain (we were testing mostly dynamically-generayed static content after all—why not cache it?). The results were clear and definitive: Varnish made a huge difference, and NLT showed us exactly how. (We've since moved the Brooklyn Beta site to EC2, along with most of the rest of our infrastructure.)

Future Sean, here. Chart's gone. )-:

This chart shows several response times over 20 seconds with only 100 concurrent requests without Varnish, and most response times less than 20 milliseconds with 500 concurrent requests. Conclusion: we got over a thousand times better performance with five times as many concurrent workers when Varnish was in play.

(Aside: I hope to blog in more detail about Varnish one day, but in the meantime, if you've got content you can cache, you should cache it. Look up how to do so with Varnish.)

If NLT sounds interesting, I encourage you to go watch the demo video and sign up. Then send Paul all kinds of bug reports and feature requests so that he can make it more awesome before he accepts the few dollars you'll be begging him to take in exchange for your use of the service.

Ideas of March

A year ago, I posted about Ideas of March, which Chris got rolling.

In it, I pledged to blog more.

Today, I am not so proud to say that I have mostly failed to do so. If I had to come up with a reason, I'd have to say that, personally, 2011 turned out a whole lot different than I was expecting, back then—and not in a good way.

Over the last year, however, I did post a few things that I think were interesting, and worth of a re-read (at risk of making this post into a clip show):

PHP Community Conference
…a post about why I was excited about going to the PHP Community Conference in Nashville, last May. It turned out to be even better than I expected, and I'm really excited that plans are coming together for a 2012 edition.
Gimme Bar no longer on CouchDB and Gimme Bar on MongoDB
…a pair of posts describing some problems we had with CouchDB, and our smooth transition to MongoDB. We're still on MongoDB, and for the most part, I still really like it. I'd hinted about these posts in last year's Ideas of March post.
Webshell
…on Webshell which I still use almost daily, but has most certainly fallen out of a reasonable upkeep schedule. I really need to find some time to clean out the cobwebs. If you use HTTP and know JavaScript, you should check it out.
Aficionado's Curse/Pessimistic Optimism
…a post that I'm particularly proud of; mostly because I've finally managed to document (and coin a term, I hope) for why things seem so bad, but aren't actually so bad.
HTTP/1.0 and the Connection header
…finally, over Christmas, I managed to post about HTTP things (-:

I was really hoping to do more. Last year, I suggested that I might turn my talk on Fifty tips, tricks and tools into a series of small blog posts, and I'd still like to do this. Hopefully in 2012. I also have a list of other things that I'm really interested in writing about. It's just matter of making time to do so. I plan to do that, this year. Starting with this post.

I'd also like to get around to writing a thing or two about beer, this year…

Much of what I said last year is still on my mind. I still miss the blogs we kept, 5+ years ago. Let's fix that.

</navelgazing>

HTTP 1.0 and the Connection header

I have a long backlog of things to write about. One of those things is Varnish (more on that in a future post). So, over these Christmas holidays, while intentionally taking a break from real work, I decided to finally do some of the research required before I can really write about how Varnish is going to make your web apps much faster.

To get some actual numbers, I broke out the Apache Benchmarking utility (ab), and decided to let it loose on my site (100 requests, 10 requests concurrently):

ab -n 100 -c 10 http://seancoates.com/codes

To my surprise, this didn't finish almost immediately. The command ran for what seemed like forever. Finally, I was presented with its output (excerpted for your reading pleasure):

Concurrency Level:      10
Time taken for tests:   152.476 seconds
Complete requests:      100
Failed requests:        0
Write errors:           0
Total transferred:      592500 bytes
HTML transferred:       566900 bytes
Requests per second:    0.66 [#/sec] (mean)
Time per request:       15247.644 [ms] (mean)
Time per request:       1524.764 [ms] (mean, across all concurrent requests)
Transfer rate:          3.79 [Kbytes/sec] received

Less than one request per second? That surely doesn't seem right. I chose /codes because the content does not depend on any sort of external service or expensive server-side processing (as described in an earlier post). Manually browsing to this same URL also feels much faster than one request per second. There's something fishy going on here.

I thought that there might be something off with my server configuration, so in order to rule out a concurrency issue, I decided to benchmark a single request:

ab -n 1 -c 1 http://seancoates.com/codes

I expected this page to load in less than 200ms. That seems reasonable for a light page that has no external dependencies, and doesn't even hit a database. Instead, I got this:

Concurrency Level:      1
Time taken for tests:   15.090 seconds
Complete requests:      1
Failed requests:        0
Write errors:           0
Total transferred:      5925 bytes
HTML transferred:       5669 bytes
Requests per second:    0.07 [#/sec] (mean)
Time per request:       15089.559 [ms] (mean)
Time per request:       15089.559 [ms] (mean, across all concurrent requests)
Transfer rate:          0.38 [Kbytes/sec] received

Over 15 seconds to render a single page‽ Clearly, this isn't what's actually happening on my site. I can confirm this with a browser, or very objectively with time and curl:

$ time curl -s http://seancoates.com/codes > /dev/null

real  0m0.122s
user  0m0.000s
sys   0m0.010s

The next step is to figure out what ab is actually doing that's taking an extra ~15 seconds. Let's crank up the verbosity (might as well go all the way to 11).

$ ab -v 11 -n 1 -c 1 http://seancoates.com/codes
(snip)
Benchmarking seancoates.com (be patient)...INFO: POST header == 
---
GET /codes HTTP/1.0
Host: seancoates.com
User-Agent: ApacheBench/2.3
Accept: */*


---
LOG: header received:
HTTP/1.1 200 OK
Date: Mon, 26 Dec 2011 16:27:32 GMT
Server: Apache/2.2.17 (Ubuntu) DAV/2 SVN/1.6.12 mod_fcgid/2.3.6 mod_ssl/2.2.17 OpenSSL/0.9.8o PHP/5.3.2
X-Powered-By: PHP/5.3.2
Vary: Accept-Encoding
Content-Length: 5669
Content-Type: text/html

<!DOCTYPE html PUBLIC "-//W3C//DTD XHTML 1.0 Strict//EN" "http://www.w3.org/TR/xhtml1/DTD/xhtml1-strict.dtd">
<html xmlns="http://www.w3.org/1999/xhtml" xml:lang="en" lang="en">
(HTML snipped from here)

LOG: Response code = 200
..done

(snip)

This all looked just fine. The really strange thing is that the output stalled right after LOG: Response code = 200 and right before ..done. So, something was causing ab to stall after the request was answered (we got a 200, and it's a small number of bytes).

This is the part where I remembered that I've seen a similar behaviour before. I've lost countless hours of my life (and now one more) to this problem: some clients (such as PHP's streams) don't handle Keep-Alives in the way that one might expect.

HTTP is hard. Really hard. Way harder than you think. Actually, it's not that hard if you remember that what you think is probably wrong if you're not absolutely sure that you're right.

ab or httpd does the wrong thing. I'm not sure which one, and I'm not even 100% sure it's wrong (because the behaviour is not defined in the spec as far as I can tell), but since it's Apache Bench, and Apache httpd, we're talking about here, we'd think they could work together. We'd be wrong, though.

Here's what's happening: ab is sending a HTTP 1.0 request with no Connection header, and httpd is assuming that it wants to keep the connection open, despite this. So, httpd hangs on to the socket for an additional—you guessed it—15 seconds, after the request is answered.

There are two easy ways to solve this. First, we can tell ab to actually use keep-alives properly with the -k argument. This allows ab to drop the connection on the client side after the request is complete. It doesn't have to wait for the server to close the connection because it expects the server to keep the socket open, awaiting further requests on the same socket; in the previous scenario, the server behaved the same way, but the client waited for the server to close the connection.

A more reliable way to ensure that the server closes the connection (and to avoid strange keep-alive related benchmarking artifacts) is to explicitly tell the server to close the connection instead of assuming that it should be kept open. This can be easily accomplished by sending a Connection: close header along with the request:

$ ab -H "Connection: close" -n1 -c1 http://seancoates.com/codes
(snip)
Concurrency Level:      1
Time taken for tests:   0.118 seconds
Complete requests:      1
Failed requests:        0
Write errors:           0
Total transferred:      5944 bytes
HTML transferred:       5669 bytes
Requests per second:    8.48 [#/sec] (mean)
Time per request:       117.955 [ms] (mean)
Time per request:       117.955 [ms] (mean, across all concurrent requests)
Transfer rate:          49.21 [Kbytes/sec] received
(snip)

118ms? That's more like it! A longer, more aggressive (and concurrent) benchmark gives me a result of 88.25 requests per second. That's in the ballpark of what I was expecting for this hardware and URL.

The moral of the story: state the persistent connection behaviour explicitly whenever making HTTP requests.

Aficionadoʼs Curse / Pessimistic Optimism

As I've mentioned in previous posts, I like beer. I mean, I really like it. I've tasted many unique, special, rare, and extremely old beers. I even have Beer Judging credentials. I would go as far as to say that I'm a "beer aficionado." I find the idea of a cheap, poorly-made beer (especially when there are superior alternatives on hand) to be almost repulsive.

I know aficionados in other fields: wine, vodka, scotch, cheese, movies, music, specific genres of music, woodworking, home electronics, office design, and even one guy I might consider a dog food aficionado.

These people, like myself when it comes to beer, often suffer from what I call "Aficionado's Curse." This syndrome affects experts in many fields, and prevents them from truly enjoying the full gamut of their medium. They are able to truly appreciate the utmost quality, but are turned off by the bottom shelf. Others (non-aficionados) are perfectly happy consuming the most readily available items and occasionally treating themselves to something fancy from the middle.

Consider someone who is completely immersed in the world of hand-made Swiss timepieces. Now, consider that person wearing a Happy-Meal-derived digital watch with a made-in-China plastic band. Unless they're trying to perfect their ironic hipster look, the cheap watch likely wouldn't fly.

In high school, long before I considered that this thing might have a name, I had a media teacher who was a film aficionado. He once told our class "When you start making movies—no matter the length—your world will change. You will stop simply being entertained by what is on the screen before your eyes, and instead will wonder how they did that, or you might marvel at the complexity of a specific shot. You'll still enjoy film, but in a different way." This nicely sums up Aficionado's Curse.

Maybe ignorance is bliss.

In a phenomenon similar to Aficionado's Curse, I've noticed a trend that cloaks optimism in pessimism. Unfortunately, I am a victim of this, and I try to keep it reined in, but I often fail.

I have very high expectations for things… nearly everything, in fact. I think that high expectations are generally a good thing, as so many things are—shall we say—of a quality less than the highest.

I expect machines to work properly, traffic to flow, computers to perform at reasonable levels, food to taste good, service to be quick and friendly, events to respect their schedules and other similar things. More often than not, though, I am let down by this unmaintainable level of optimism. The bad part is that in my letdown, I often find myself complaining (or if I've managed to keep it under control, not complaining) about such things. Not because the thing I've just witnessed is completely broken, but more like because it's sub-optimal in some way. These complaints are (reasonably, I admit) perceived as pessimism. My optimism has precipitated as pessimism.

I think this happens to smart people quite a bit. I've worked with people who are extremely unpleasant, but also extremely kind and forgiving. This may have been due to the scenario described above.

I saw this on Fred Wilson's blog a while back, and I think it's relevant:

"sometimes we make money with brilliant people who are easy to get along with, most often we make money with brilliant people who are hard to get along with, but we rarely make money with normal people who are easy to get along with."

One of the greatest things I learned from Chris when working at OmniTI was something that he didn't intentionally teach me (at least not as part of my job): it's OK to be let down, but complaining about it doesn't often breed positive change. I've tried to apply this to my public persona in the past few years, and at risk of sounding like a complaint, I think we'd all do well to follow Chris's lead, and strive to be brilliant people who are also easy to get along with.